


Are you Looking to infuse excitement into your DIY clothing and textile projects? Puff Vinyl, also known as Puff Heat Transfer Vinyl, could be the secret ingredient you've been searching for. This extraordinary heat transfer material springs to life with the application of heat, giving rise to embossed patterns and designs that elevate your fabric creations, delivering both a tactile and visual delight.
In this comprehensive guide, I'll walk you through puff vinyl heat settings and the process of using puff vinyl. Whether you're a seasoned DIY enthusiast or just starting your creative journey, you'll discover valuable insights and practical tips to make your creations stand out.
Part 1: Basic Information about Puff Vinyl
1. What is Puff Vinyl?
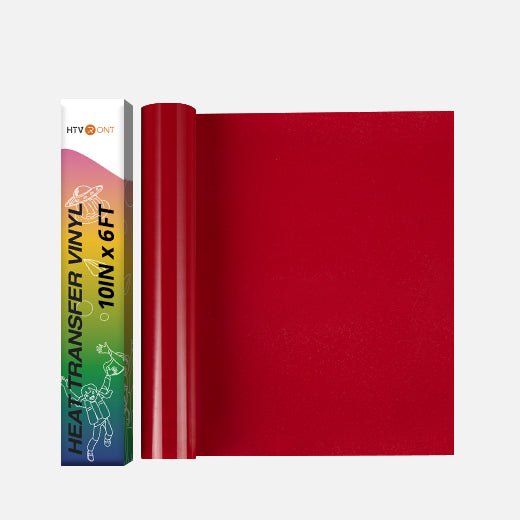
Get Your Best Puff Vinyl Here!
- Achieve Stunning 3D Effects with 3D Puff Vinyl.
- Discover the incredible world of 3D effects with our high-quality 3D Puff Vinyl.
- Elevate your designs and make them pop off the page with this innovative material.
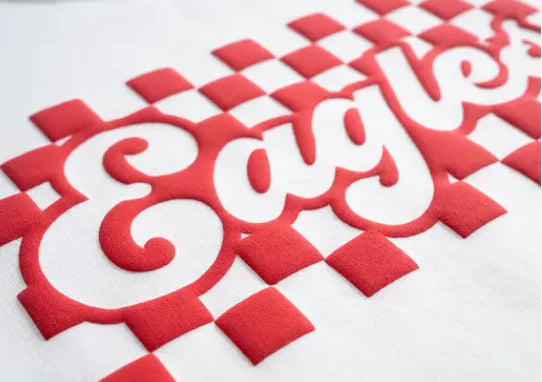
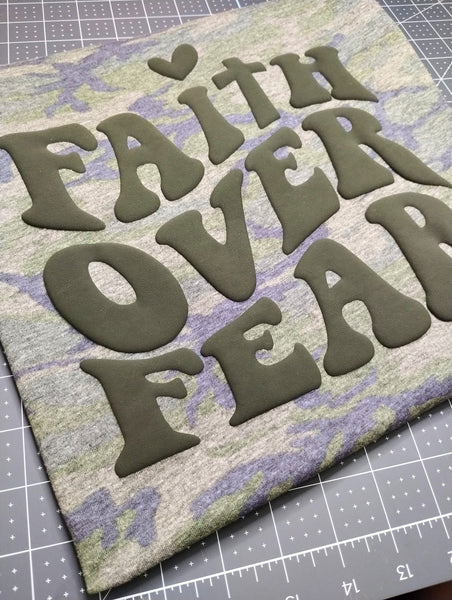
Puff Vinyl is a distinctive heat transfer material known for its remarkable ability to expand and create a textured, 3D effect when exposed to heat. This unique feature imparts a raised, tactile quality to your garments, making them visually appealing and interesting to touch.
Sometimes referred to as 3D vinyl or by various other names, this versatile material can be applied to a wide range of surfaces, similar to traditional iron-on transfers. However, it truly shines when used on fabric, as it enhances the appearance of shirts, adding an extra dimension to your designs. The resulting "puffed up" look is especially striking on fabric and offers the creative flexibility to create unique tone-on-tone effects for a one-of-a-kind finish.
2. Puff Vinyl Heat Settings:
- Temp: 300~320℉
- Pressure: Medium Pressure
- Time: 10~15 seconds
- Hot Peel
3. Cautions & Tips:
Before diving into your Puff Vinyl projects, it's important to consider some key factors for achieving the best results. Here are some cautions and tips to keep inmind:
- Temperature and Color Variations: Remember that the puff effect can vary depending on the color and temperature. Experimenting with different combinations can yield exciting results.
- Test Before Applying: To ensure your final design looks just as you envision, it's a good idea to cut a small square and test the proper time and temp of puff vinyl according to puff vinyl heat settings before applying it to your main project.
- Ideal for Cotton: Puff Vinyl works exceptionally well on cotton fabric, so consider using cotton materials for your projects to achieve the best outcomes.
Following these cautions and tips will help you make the most of your Puff Vinyl creations and ensure they turn out as intended.
Part 2: How to Use Puff Vinyl to Make a T-shirt
1. Materials & Tools to Make a Puff Vinyl T-Shirt:
- A T-shirt – I used a Long Length T-Shirt
- 3D Puff Vinyl – I used HTVRONT Green 3D Puff Vinyl
- A craft cutter — I used the amazing Cricut Maker 3
- A heat press – I used the HTVRONT Auto Heat Press
- HTVRONT Mat and Weeding Tools
2. Step-by-step Instructions:
STEP 1: Mirror design & cut
You can create a custom design using cutting software or get ready-made design files in formats like SVG, JPG, or PNG. Make sure to choose the right size for your project; for example, 8 inches width is a good starting point for adult medium T-shirts, and you can adjust as needed.
Before cutting, remember to mirror your design. Place the puff vinyl shiny side down on the cutting mat to cut the vinyl, not the backing. Set the correct cutting settings for the material, and you're all set.
STEP 2: Weed excess vinyl
Once you have finished cutting, carefully remove the vinyl from the mat. Now, it's time to utilize your weeding tools. HTV crafters often refer to these special tools as hooks or craft knives. They aim to help you remove any excess vinyl you don't want to transfer onto your shirt. To maximize material usage, consider using scissors to cut around the pattern before proceeding with the weeding process. Begin from the outer edges and gradually work your way inwards until all the unwanted vinyl has been successfully weeded out.
STEP 3: Heat press
Follow the guide's instructions to preheat your heat press and place your pre-washed shirt on the machine's heat press mat. Preheat the shirt for 5 seconds, which readies it and smoothes out wrinkles.
Place the vinyl with the shiny side up on the shirt, and protect the vinyl, fabric, and machine by covering the design with a Teflon sheet.
Next, refer to your puff vinyl heat settings for specific instructions. For my cotton T-shirt, I applied medium pressure at a temperature 310℉ for 15 seconds.
STEP 4: Hot Peel
To achieve optimal adhesion, ensure to peel off the plastic transfer paper while it's still hot. It's advisable to wear heat-resistant gloves while performing this step. Remember: Do not wash the T-shirt within 24 hours after applying the vinyl!
Part 3: Answers to Your Questions About How to Use Puff Vinyl
Q: Which side of puff vinyl goes down?
A: The shiny side should be facing up when applying Puff Vinyl to your fabric. This side is designed to be the exposed surface for the best effect.
Q: Why is my puff vinyl not sticking?
A: If your Puff Vinyl isn't adhering properly, the most likely issue is insufficient pressure during the application process. Make sure you apply adequate pressure to ensure a strong bond between the vinyl and fabric.
Q: Can you repress puff vinyl?
A: No, Puff Vinyl should not be repressed. Once it has been heated and set, attempting to repress it could damage the material or affect the desired 3D effect. It's best to avoid repressing it.
Q: How do you care for puff vinyl T-shirts?
A: To keep your Puff Vinyl T-shirts looking their best, it's crucial to wait a minimum of 24 hours after applying the vinyl before laundering. This brief waiting time ensures that the adhesive sets correctly. When it's time to wash your shirt, remember to invert it, opt for a gentle washing cycle, and refrain from using strong detergents or bleach to extend the longevity of your design.
Part 4: Summary
By the end of this guide, you'll have the knowledge and confidence to use Puff Vinyl effectively in your DIY projects. Whether you want to personalize T-shirts, hoodies, or other textile items, Puff Vinyl opens up a world of creative possibilities. Get ready to make your designs pop with this exciting heat transfer material!


![[Starter Kit] Auto Heat Press Machine 15" x 15" 110V + Starter Kit Bundle](http://www.htvront.com/cdn/shop/files/20240425-170634_385x.jpg?v=1714036345)
![[Premium Bundle] Auto Heat Press Machine 15" x 15" 110V + 20 rolls HTV Bundle 12“x3ft + Mini 2 Heat Press Machine + Random Sublimation & HTV Bundle ≥ $180](http://www.htvront.com/cdn/shop/files/1UK_4_22c12b1b-12dd-4105-ac25-93e2faae6a8c_385x.jpg?v=1713863580)


